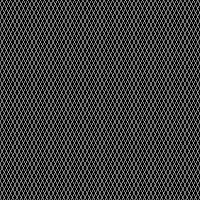
I started off by opening a new image 8cm * 8cm with a transparent background. Then I set the grid at .5cm and the foreground colour as white with a black background.
 Select the pen tool and change the line width to at least 6 (the higher the number the thicker the trellis will be and dont forget if it's too thin the card may not hold the cut), use the grid lines as a guide and draw a diamond. I chose to make a diamond 1cm wide and 2cm long. The size at this point doesnt really matter as long as you have the ratio (how long to how thin) as you want it.
Select the flood fill tool, then right click inside the diamond and outside. You'll now have a black image with the outline of the white diamond.
 Zoom right in so you can see all 4 points clearly then select the crop tool. Very carefully crop the image so that you have no black areas showing at the very tips of the points. Because I wasn't to the nth precise when I drew the diamond I had to crop a smidge of white away.

Save this image as a jpg, I called mine single diamond.
Minimise this image and open a new image but this time make it 12*12 inch. (or 6*12 if you have the baby cricut)

Select the flood fill tool again then click the white foreground colour in your materials swatch. The materials properties box will open now click the pattern tab. The first 2 of the thumbnails should be your saved diamond and the image you are working on. Choose the single diamond and click ok.

Now left click anywhere on your new image and it will fill up with a trellis pattern.

If your trellis looks as though the holes will be too big undo the flood fill by going to edit then undo. Click back on the material swatch and change the scale. You can also play with the rotation if you want something a bit whacky. Once you're happy that the trellis is the right size save the image, I called mine trellis master. On it's own it isnt really any good for anything but it will make making trellis images a lot quicker in the future. I'll add another tutorial tomorrow on how to turn this into shaped trellis.


No comments:
Post a Comment