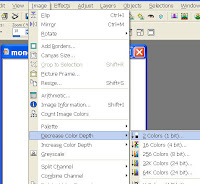
I find it easier to work with the image in black and white. So open your image, go to image/decrease colour and chose the 2 color option.

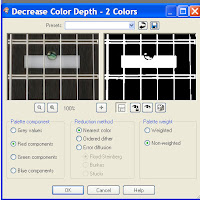
You'll get a box pop up with several options, the settings I use are as the pic but I do sometimes play about to see if an image is improved by using different settings. Click ok when you're happy with the image.

Because the image always opens as a background instead of a layer I always duplicate the layer then delete the background. You wont notice anything different as a rule but it is important.
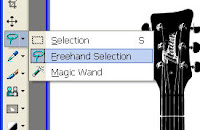
You now need to chose the magic wand from the side task bar. The magic wand works by chosing linked areas of the same colour.

Click anywhere on the white area and it will all be selected. Hit the delete button and it will disappear.
If you look closely at the picture you'll notice that the white area from the guitar has also disappeared. This is because the white frets and the chunk at the bottom had nothing to determine it from the background. This isnt always a bad thing but in this case we need each layer to be clearly marked.
Choose the pen tool from the right task bar and very carefully draw a line along the bottom area and along the edges of the frets. This is going to be your cutting line so it needs to be as accurate as possible.
Click the original layer then select the magic wand again and click on the outside of the guitar somewhere on the chequer board. Go to selections and chose invert.
Because we need a solid image we have to colour it in, chose the paintbrush and make sure it's got a large size and colour in. No need to go carefully it wont let you colour outside. If you do find you've coloured over the edges it's because you didnt draw the lines properly. Use the edit undo function and go back and find those missing bits.
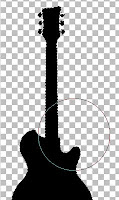
Your guitar should look like this now. If you look you will see how large a brush I used and how it didnt go over the edge.
Your guitar should look like this now. If you look you will see how large a brush I used and how it didnt go over the edge.

Select your 2nd layer and using the magic wand click on the chequered area by the 7, hold the shift key on your keyboard and select the large area that will also be part of the 2nd layer. Go to selections invert and again hit delete go back to selection and invert again. This is where it looks scarey as the entire 2nd guitar has disappeared and you''' be left with the lil dash lines, dont worry. Go to the paint brush tool again and colour it in.
You will be left with the tiny areas at the base of the strings, go to selection and select none. Using a small sized paint brush carefully colour in.
With most other images we would be using the next of the duplicate layers to work on. However there's no point with this image as the only thing we will be using is the small area where the 7 was. Click on it with the magic wand then go to edit/copy, edit/paste as new layer. If I wanted to add the small rectangular bridge area as I did with the previous cutting pattern it would be easy enough to use the rectangular selection tool and colour in then use the move tool to be able to differentiate it from the layer below.
All you need to do now is move everything into position with the move tool, delete the spare layer and save as a jpg.


No comments:
Post a Comment