Now I know loads of peeps arent using scal for much more than cutting fonts... tut tut... wicked waste.
So here goes how I use psp to convert a coloured image into a pattern ready for inkscape to trace & SCAL to cut. It isnt the quickest but it's possibly the easiest for people who arent too familiar with psp.
Here's the pic I found online of a guitar. 

Open the image in PSP, then go to layers/duplicate 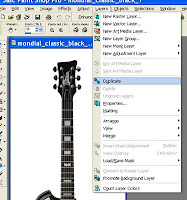
Click on the layer visibility on the layer named background. You'll get a red cross showing as in the pic but you wont notice any difference to the picture.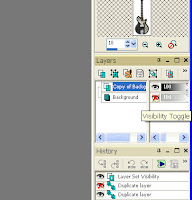

Click on the layer visibility on the layer named background. You'll get a red cross showing as in the pic but you wont notice any difference to the picture.

Chose your magic wand tool, mine is on the side menu bar. Click on the white area around the guitar.

 You'll have little flashing dashes to show that you've selected the white areas.
Hit the delete button and all of the white will disappear leaving you with a chequered background.
You now need to make 2 more duplicate layers again. To make it easier to work with I like to name my layers. You do this by right clicking on the layer and chosing rename.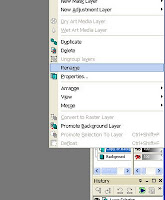

Being totally original I called mine top middle & bottom.

Because this image it too small to have 3 identical images side by side you need to change the canvas size.
 DONT resize the image, as that makes the image larger but doesnt give you any room to play.
 Select the move tool and use it to move your 3 images so they are all next to each other.
 You might notice that as you move each layer it highlights where you named each layer. This is an important feature and you need to make sure as you are working on a layer that it's actually highlighting the right one.
 Make sure the top layer is highlighted and select the selection tool (the box shaped one)
 Use the tool to draw a box around the guitar, (doesnt matter if it goes over the next) and click inside. Those dashed lines will appear around the outside.
  Select the paintbrush tool
 Colour all the way over the guitar, those dashed lines will stop you colouring over the edge so it's perfectly safe to use a large brush and really go for it.
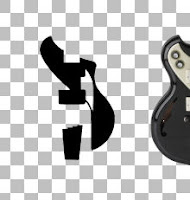
Now for the time consuming bit, we need to rub out all the areas we dont want to cut.
Select your middle layer and zoom right in so you can clearly see the edge. It doesnt matter if you can only see a small section of the image.

Now choose the eraser tool.
 and very carefully rub out all the bits you dont want. If you accidentally rub out a bit too much just go to edit then click undo. You can undo as many steps as you want.
 Eventually your layer will look like this.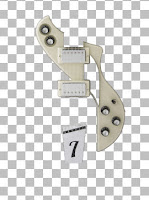 Using the same method as before draw around with the selection tool, click inside the box then paint over.
 You might find a few areas that need to be erased, dont be afraid to change the size or shape of the brush if it makes it easier for you to get into small areas or create a straight line.
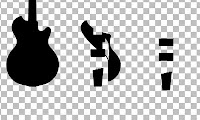 You should have an image like this. As it stands it will waste a load of card when it cuts so I use the move tool to drag the shapes closer together.
 Using the same method as before draw around with the selection tool, click inside the box then paint over.
 You might find a few areas that need to be erased, dont be afraid to change the size or shape of the brush if it makes it easier for you to get into small areas or create a straight line.
Select your top layer and repeat with the eraser

Final time to draw around with the selection tool, click inside then paint over.
 You should have an image like this. As it stands it will waste a load of card when it cuts so I use the move tool to drag the shapes closer together.
 If like me you use 2 pieces of different card on 1 mat make sure you leave a decent space in between otherwise you'll be fiddling around to get the card in the right spot.
Now all you need to do is save as a jpg. It will warn you that it needs to flatten the image which is fine.
There are quicker ways to get rid of the waste areas but that's for those who have more of a knowledge of the selection & drawing tools. I will try to do a tut on it but not for a few days at least ;o)
There are quicker ways to get rid of the waste areas but that's for those who have more of a knowledge of the selection & drawing tools. I will try to do a tut on it but not for a few days at least ;o)
2 comments:
Awesomwe tutorial. I bookmarked you for that.
Just popping in to say "Hi" and hope you are OK. I have just discovered your blog and its great. I am now the proud owner of a Cricut baby so maybe asking you some questions !!!
Take care,
Jo x
Post a Comment