Saturday, 30 August 2008

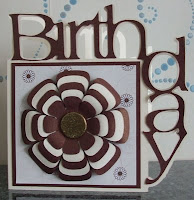
Corner word card.

As promised here's the step by step on how to make a corner word card in PSP.


Open a new image with a transparent background. I have an expressions so generally use one 12*12 inches.

Go to view and click change grid, change the horizontal & vertical spacing to 1 inch. Go back to view and click to view the grid if it isnt showing.


Chose the font tool and select a nice chunky font without any thin flourishes as these might be too fine to cut well. For this one I used rounded arial and chose 300 as the size.

Create a new layer and type the first letter you want, create a new layer and type the 2nd letter, create a new layer & type the 3rd. Carry on with a new layer for each letter. This is important as you need to be able to move each letter individually. At this stage it doesnt matter whether the letters are clearly spaced, on top of each other or even in the right order.


Select the move tool and move each letter in to place. I use the 1" grid as a guide, making sure that the top & right side are all lined up tidily.


Once you're happy with the placement save the image as a jpg, this is so that you can create an inner layer in scal.
Now chose the draw shape tool from the right hand task bar and draw a rectangle from the top inner right corner down to the bottom left corner. Make sure you overlap a tiny bit of the letters otherwise they wont be attached to the finished card.


Go to layers and merge visible.


Chose the rectangular selection tool and use it to draw a large rectangle over the image making sure it covers all of the image. Click anywhere inside and the lil dashed lines will be all the way around the edges of the image. Chose the paint brush tool and colour it in. For speed I use as large a brush as possible.


Click selections, select none then layers, duplicate layer. Now click image/ mirror.


Your image should look something like the one below.


If you look closely you'll see that the 2 layers are larger than the image, go to image/canvas size and enlarge the canvas width, I changed to 24 * 24. The size doesnt matter as long as it's big enough to fit both layers side by side and a bit of spare space.


Zoom in until you have a really good view of the top of the image. Use the move tool to get both layers joined up. It's important to get them lined up accurately otherwise when you fold the back wont be the same as the front.


Once you're happy, layers/flatten. Zoom out and use the crop tool to get rid of the excess white areas. Save as a jpg and use inkscape to convert to an SVG ready for scal to cut.


Once cut it's just a case of scoring down the middle and decorating.


Promised PSP tut.

This is a different way of making a picture into a 3d cutting pattern. I'm using the same guitar image as before but instead of carefully erasing with the eraser tool we're going to use the magic wand.


I find it easier to work with the image in black and white. So open your image, go to image/decrease colour and chose the 2 color option.


You'll get a box pop up with several options, the settings I use are as the pic but I do sometimes play about to see if an image is improved by using different settings. Click ok when you're happy with the image.


Because the image always opens as a background instead of a layer I always duplicate the layer then delete the background. You wont notice anything different as a rule but it is important.


You now need to chose the magic wand from the side task bar. The magic wand works by chosing linked areas of the same colour.


Click anywhere on the white area and it will all be selected. Hit the delete button and it will disappear.


If you look closely at the picture you'll notice that the white area from the guitar has also disappeared. This is because the white frets and the chunk at the bottom had nothing to determine it from the background. This isnt always a bad thing but in this case we need each layer to be clearly marked.


Choose the pen tool from the right task bar and very carefully draw a line along the bottom area and along the edges of the frets. This is going to be your cutting line so it needs to be as accurate as possible.


Once you've drawn the missing lines duplicate the layer a couple of times.

Click the original layer then select the magic wand again and click on the outside of the guitar somewhere on the chequer board. Go to selections and chose invert.


Because we need a solid image we have to colour it in, chose the paintbrush and make sure it's got a large size and colour in. No need to go carefully it wont let you colour outside. If you do find you've coloured over the edges it's because you didnt draw the lines properly. Use the edit undo function and go back and find those missing bits.

Your guitar should look like this now. If you look you will see how large a brush I used and how it didnt go over the edge.


Select your 2nd layer and using the magic wand click on the chequered area by the 7, hold the shift key on your keyboard and select the large area that will also be part of the 2nd layer. Go to selections invert and again hit delete go back to selection and invert again. This is where it looks scarey as the entire 2nd guitar has disappeared and you''' be left with the lil dash lines, dont worry. Go to the paint brush tool again and colour it in.


You will be left with the tiny areas at the base of the strings, go to selection and select none. Using a small sized paint brush carefully colour in.


With most other images we would be using the next of the duplicate layers to work on. However there's no point with this image as the only thing we will be using is the small area where the 7 was. Click on it with the magic wand then go to edit/copy, edit/paste as new layer. If I wanted to add the small rectangular bridge area as I did with the previous cutting pattern it would be easy enough to use the rectangular selection tool and colour in then use the move tool to be able to differentiate it from the layer below.


All you need to do now is move everything into position with the move tool, delete the spare layer and save as a jpg.

Thursday, 28 August 2008

Playing with stencils

I've been playing with stencils this week and while taking breaks from all the cutting I've been blog hopping. On Friday Sketchers I found a sketch that seemed to lend itself to a tag topper. So out came my sadly neglected tag stencils from Marianne, Tildas dog stamp, a sizzlet and a scrap in a stack kit from DCWV which I bought months ago intending to make a scrap book of my lil staffie. The scrapbook hasnt happened so I've made her a birthday card ready for Nov 4th. I wont say what hubby called me when he saw it, but it was full of rude words ;o)


Back to decoupage for this one, again a Marianne stencil but this time I had to make a 15cm gatefold with fold backs. I didnt have any card large enough so I joined 2 pieces of cream linen together. The fairy is a Romak design, paper is from a DCWV stack, some red pearly card some gold peeloff borders and a sore finger from all the cutwork.


Sunday, 24 August 2008

Couple more Tildas

Not so sure about this one, in theory it should work, layout is from a sketch, colours & themes match but something is wrong or missing. Havent a clue what though so I'll probably cannabalise it and start again. Merry Christmas is .75inc Gill sans font cut on the cricut with a 3 & 9 shadow. Nesties & bug folder with my F&C pencils, sakura for a bit of glitter and the asterisk paper is another Pebbles one.


Back to one of my favourite techniques, dry embossing and a blade. Marianne stencil with new Anitas paper & vellum and a couple of magnolia stamps. This time I stamped on pearlescent white card, not so good for the watercolour pencils but gives a lovely glisten in real life.


Thursday, 21 August 2008

Some stamped cards

Stamping isnt my favourite technique, even tho I buy far too many stamps & inks, but after finding Faber & Castell watercolour pencils I think my colouring is improving. They arent exactly cheap but I can really recommend them. www.artifolk.co.uk and Hobbycraft sell them individually for about £1.40 If you're a tilda/sugar nellie/hanglar fan and cant justify a full set at least get the light & medium skin tones and see what you think.


Nesties with papers from Glitterpot. All of the sentiments stamps are from a clear set, either a penny black or hero arts, not sure which but they were bought at Glitterpot.

Sarah Kay stamp from Sirstampalot with DCWV papers. Scalloped card was cut with the cricut & scal.

Again DCWV papers have added a flourish dingbat cut with scal.

Orange paper from DCWV and the green & mauves from a Trimcraft set I regretted buying. Not my favourite card but I was playing with an interactive colour wheel on http://www.colorsontheweb.com/colorwizard.asp#wizard and it suggested purple, orange & green. Most odd as I'd been working with those colours on the last few cards. The bindis are art of craft.